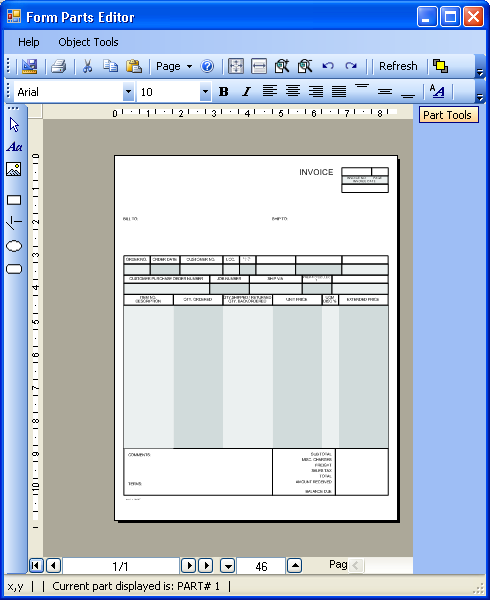

The Form Parts Editor allows you to create multiple part forms. The editor is found in both Form Control Master and Form Control.
Form Parts Editor in Form Control Master alters the defaults for this form in ALL companies.
Form Parts Editor in Form Control alters the parts for this form a specific company.
Each part can have different text and graphics on it. If there is a form overlay associated with the form you will see it in the background. You may not modify the form overlay in this window. It is there for reference only so you can position text and graphics for each part.
A default set of parts is usually already defined in Form Control Master. You should not modify the defaults unless you wish to change the default settings for this form for all companies. You can change the part settings for specific forms for a company in Form Control.
You can alter the parts that are already setup or you can delete all the parts and start over.
Generally you will start with one page containing just the image of the form overlay. If this is NOT a check form you will add a Company Name Block at the top left corner using the Part Tools Menu. Next you may elect to add a part title at the bottom of the page.
Once you have the first part done with everything in the correct position, you can duplicate the page, again from the Part Tools menu. Finally you can go back and alter items on a part by part basis.
Add Company Name Block
Adds a block that serves as a place holder for your company name as defined in Company Control. You may change the location of the block, font and font alignment only. If you want to add a company logo edit the Form Parts in Form Control. Do enter any company specific information when editing parts in Form Control Master.
Add Part
Adds a blank part. Does not copy the current part changes to the new part.
Add Duplicate of Current
Creates a new part and copies the current part changes to the new part.
Remove Part
Removes the current part.
Add a Price Blackout Area
Adds a sizeable rectangle that can be used to cover price columns on certain parts. You may also use the frame tool from the object toolbar on the left.
Add a Part Title to the Bottom of Page
Adds a text block at the bottom of the page that can be altered for different part titles.
Important Tools to Know About
There are dozens of tools on the Form Parts Editor toolbars. The following are ones you need to more fully understand.
Toggles the form overlay visibility. This allows you to see the changes that you have made as opposed to what is visible on the form overlay
Show Object Borders. This tool causes a non printing light grey outline to appear around all objects on the page. This is used to locate invisible objects.
Snap to Grid toggle. There is a default grid that all objects will snap to. If you need to move an object in smaller increments disable the grid and use the arrow keys or mouse to move the object.
Image Tool. Imports an image file from disk.
Frame Tool. Draws a frame. Double click on the frame to add text to the frame.
Mouse Actions
Deactivate Object
Click on a blank part of the page to deactivate an object.
Exit Object Creation Mode
When in object creation mode and are done creating objects, right click to exit object creation mode.
Key Stroke Actions
Arrow keys
Move objects around the page
Arrow Keys AND Snap to Grid On
Shift Arrow Keys, Ctrl Arrow Keys
Expand and Contract objects in grid steps
+ key on numeric keypad
Zoom In
- key on numeric keypad
Zoom Out